
5 Unpleasant Mistakes I Made With My DIY Composting Toilet – Q&A
This post may contain affiliate links to support the upkeep of this blog - at no extra cost to you! Please read my disclaimer for more info.
When we were looking for an RV, the toilet was one of the main concerns for me. We had used a portable chemical porta potti before, in our self-built campervan in New Zealand, but I found emptying it cumbersome. Therefore I really wanted one with a holding tank that could be removed from the outside.
When we then finally found the van for us, the toilet was completely opposite to everything I wanted, but as the deal was so good otherwise, we went for it. I had to rethink my whole approach to this matter and started to google. It didn’t take me long to find out about DIY composting toilets and I knew immediately that this was something I wanted to try out.
You might also be interested in
► 80 Jaw-Dropping RV Bathroom Renovations
► How to DIY Faux Tile in an RV or a Camper – Subway and Herringbone
► How to Freshen Up Your RV Bathroom – 15 RV Bathroom Makeover Ideas
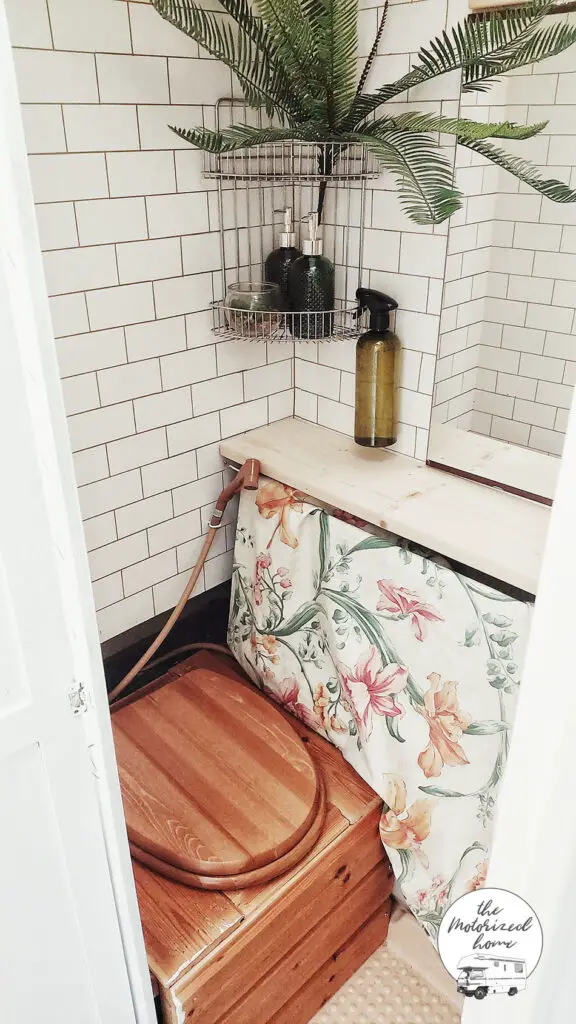
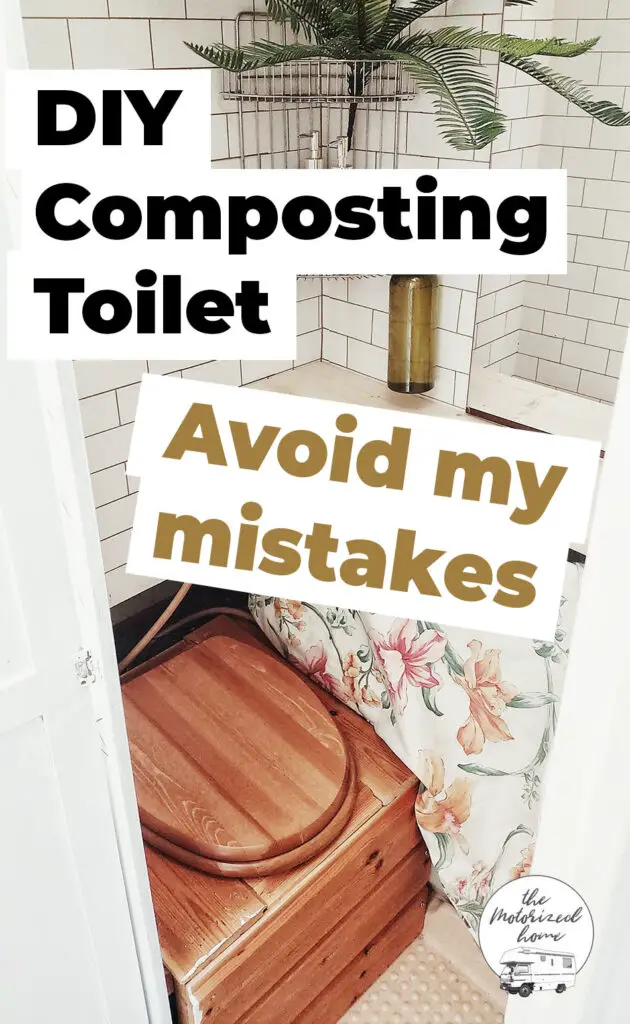
What is a DIY composting toilet?
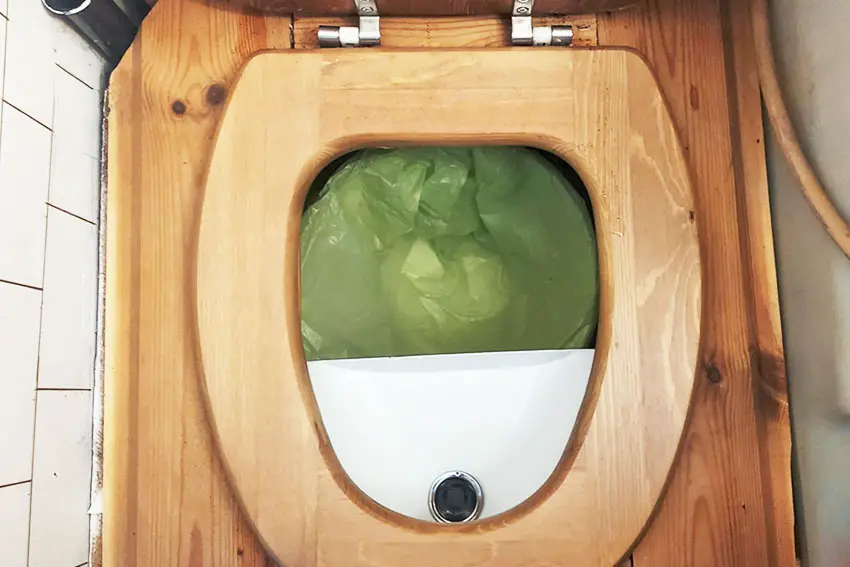
In case you haven’t heard of these before, let me briefly explain. Basically it is a bucket toilet, except that number ones and number twos are separated – this is meant to keep the smells at bay. Whether it does or doesn’t, I’ll get to that soon…
How can I make a DIY composting toilet?
One reason that makes a DIY composting toilet such an attractive option, is that it is super easy to make. Essentially you just make a box, screw a toilet lid on it, attach a separator, put two buckets inside and ta-daah, it is ready.
The main thing about a composting toilet is the separator. I ordered mine from We Pee, a British company that has specialized in composting toilets and eco-living. You can get one in black or white and they ship them all over the world, without any shipping fees! Definitely check them out here. (This is not an affiliate link. Just love them)
They have also included an installation guide and free plans of how to build a composting toilet on their website, read them here.
Does composting toilet smell?
Yes and no. Not in a way I imagined it would – generally it doesn’t smell any more than a normal toilet and I can never smell it in the van, especially when the toilet lid is down.
Emptying the number two bucket, the one I was originally worried about, doesn’t really smell either, as I just tie the bag and throw it in the bin/trash can. The separator and sawdust on top of the stuff really work. If you are still worried about the poo smell though, some people have successfully installed small computer fans to circulate the air.
The smelliest part of this whole thing is actually emptying the number one bucket – ours is way too small, I wish I could have made it a bit bigger – maybe adding some water on the bottom first would have helped. So make sure you plan storing and emptying the number one carefully when planning to build a DIY composting toilet! Read more below about the other mistakes I made.
Would I build a composting toilet again?
Yes and no. In this particular van? No, I don’t think so, as there isn’t enough space really for it to be any more comfortable to use than a porta potti. If I had more space? Yes, definitely.
The problem with the van we have is that the bathroom is less than 6 square feet small and in this space, we have to have the toilet, AND the freshwater tank AND some space to turn around, huh.
So, for example, 1) I had to build the sawdust/moss container behind the toilet, which is pretty cumbersome 2) it was difficult to build a big enough container for number ones, and 3) as the space is so tight, lifting the whole box lid is a bit cramped. So if I had enough space to comfortably open the lid, move around, and have big enough containers, I’d be more than happy with my DIY composting toilet.
What mistakes did I make with my DIY composting toilet and how would I fix them now?
As mentioned above, I had restricted space that forced me to make some of the decisions I made. I thought I’d still write down these mistakes though, so it would be easier for you to avoid similar problems in your own project.
1 – My no. 1 container is too small and cumbersome to empty.
When I was planning the toilet seat, I wanted it to be the same height as the ordinary toilet seat in the house we lived. The problem is that the floor is raised where the toilet is, so it really doesn’t leave much space for the actual bucket. Our bucket is a 2,7 liter (0,7 gallons) ex-soap container, and as an average human can pee usually up to 2 liters (0,5 gallons) a day and there is two of us, we kinda have to empty it at least once a day.
How would I do it now? Get your buckets first and make the measurements and plans after! I could have built the toilet higher and maybe add an extra step if needed. (And maybe store the composting material inside the step?).
Also, make sure you plan emptying it well too. If I had space, I would now have a long pipe to go from the separator to a bigger bucket somewhere outside the toilet cubicle, for example, if your RV has “a garage” or a van with storage/garage place underneath a bed for example. Basically, wherever it would be easy to empty from outside! Having said that, that was the next mistake……
2 – My no.1 container is too close to the separator and too thin material.
My no.1 bucket is connected straight to the separator. Pro tip I learned: Don’t. Connecting it with pipe reduces the smell problems. The second problem I’ve found after a few months is that I should have got a bucket of thicker material or be prepared to buy a new container every now and then. Strong stuff, eh.
3 – I built my composting material storage behind the toilet.
I kinda had to, as there was no space around the seat. This is not the end of the world, you just have to scoop some composting material the lid closed, but just for the ease of use, if you can, definitely do it next to the toilet seat and think practicality in the planning phase.
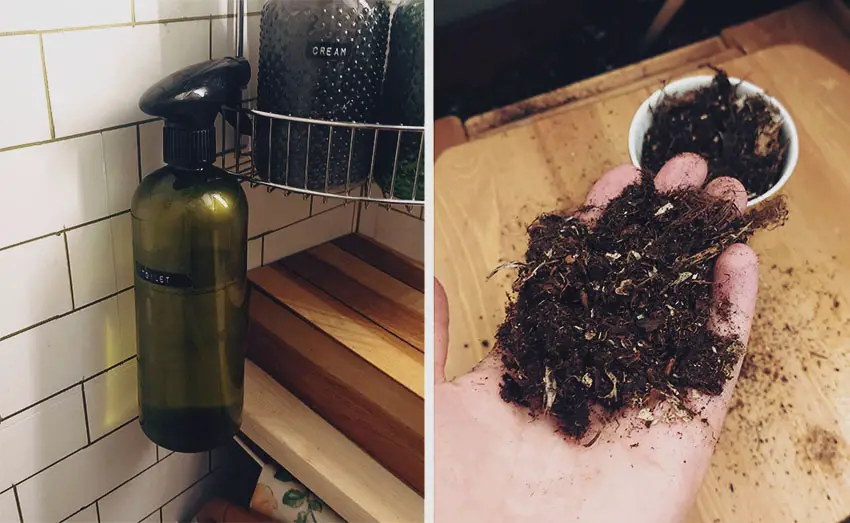
4 – I used the wrong kind of composting material.

The most used material to cover your number twos in DIY composting toilets is sawdust and for a good reason: it is light, inexpensive, and doesn’t smell (or smells nice). We are currently in Finland where many people have summer cottages with composting toilets, hence why you can buy composting material from almost any shop. The problem is that the stuff was heavy, very soil-like – it also smelled like it. It was also a bit “dusty” – a pain to clean. So definitely try sawdust first.
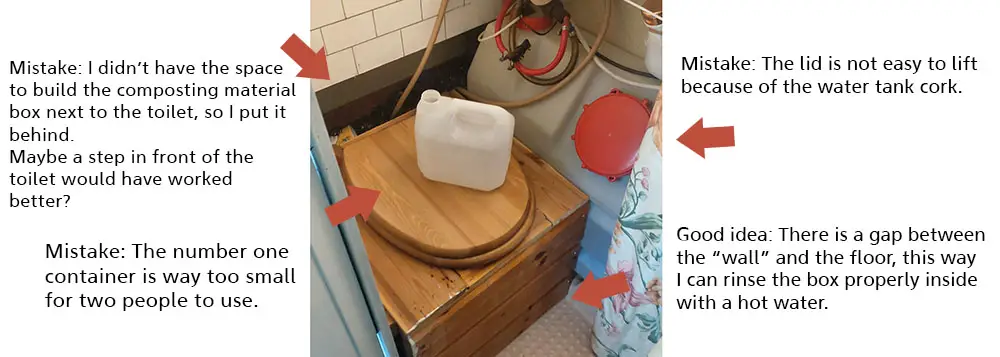
5 – I didn’t plan opening the box well enough.
As mentioned, my toilet is small. When I was planning the toilet, I didn’t take into consideration how easy it would be to open and close the box – it can be lifted, but it is a bit cumbersome as the water tank cork is a little bit on the way.
So if you are planning to make yours, make sure the lid is easy to open, preferably on hinges and stays up properly when you want to keep it open, like when you are emptying it. Another way that would have probably worked better, especially for my toilet, would have been to have a door open from the front too.
►► Also, this one is important and I have seen even a carpenter by profession make this mistake: remember that your separator is close to the edge of the lid, and when you lift it, the pipe connection will hit the side of the box if you don’t calculate it in your drawings!! ◄◄
What did I do right?
Most tutorials tell you to screw or glue the separator onto the bottom wood under the toilet seat. I didn’t install mine permanently – originally I didn’t want to make any holes into it in case I wanted to use it in another project later, but it turned out to be really handy to be able to pull it out and take it for a good wash.
Another thing I am happy about, is that as the toilet is built on a bathroom floor that is supposed to be a shower tray, I could leave a gap in the front on the bottom – this works as a drainage hole so I can pour hot water inside for a good rinse.
What are the pros and cons about building a composting toilet?
Pros
+ It is super easy and cheap to build
+ Easy to use
+ You don’t have to waste any water or electricity
+ No sewage needed
+ No need to use any chemicals
+ You are not dependent on finding a dedicated place to empty it
+ You have a total control over the design (I have included a few prime examples below)
Cons
– It can smell if not properly planned and taken care of
– You might have to empty the number one container fairly often
– As a man, you always have to sit when you pee
A few examples of beautiful composting toilets
This one looks like a perfect setup. Enough space, good height, comfortable toilet seat, a door in the front, and the composting material is next to the toilet with nice lids.
You might also be interested in
► 80 Jaw-Dropping RV Bathroom Renovations
► How to DIY Faux Tile in an RV or a Camper – Subway and Herringbone
► How to Freshen Up Your RV Bathroom – 15 RV Bathroom Makeover Ideas
Please let me know in the comments if you have any questions left unanswered!
Pin me for later!


6 Comments
Bekah
Thanks for sharing! This is exactly what I want to do in my small RV when I am able to renovate. I appreciate all the pointers that are sure to be helpful.
Aino
Thanks for your comment, I’m super happy if they were helpful in any way!
Keira R.
This is a super helpful post. I just stumbled upon your blog after a google search about diy composting rv toilets and I am so thankful I did! This definitely gives me more confidence and knowledge to try and build our own vs buying a really expensive version… thank you!
Aino
Thank you for your lovely comment, I’m soo glad to hear this! Good luck with your project! 🙂
Jodie Douglas
Great article, thank you! Just curious all these square designs, I wonder if they cut into the back of your legs when you’re taking a….long sit. As opposed to the rounded toilet seats that curve away from the back of your legs. Have you found this? Or is it just as comfortable?
Aino
Haha, a great question. Personally I didn’t notice much difference 😀 I guess it depends on how you sit on the loo normally, whether you would bend your legs or not. I have seen some rounded DIY seats too, they look great, just a bit more work and require piping instead of a container straight under the seat.